Last week I was again at the powder-coater, Marshalls, and asked about a bead blaster…he recommended one not one hundred yards from him, and so I trotted off to take my gearbox-casing, now a hollow shell. He was very friendly and quite interested and seems to do lots of bike bits for people, so I left it there. Next day, I got a call…ready!! Blow me down!
Off I went and picked up the casing, which was really well done (and only $25!), but the finish is not what I wanted, actually. The finish was almost white, matt and smooth, it looked like it had been painted silver! We spoke about it awhile and he recommended instead of glass beads (I think he used 250µ, far too small for my taste) and suggested using plastic beads the next time, a lot larger, to give it a glossier sheen, but still give it a good clean.
That I will, with the other box that I have, but in the meantime wanted to move on with the restoration and finish off the gearbox, so I decided to ‘take things into my own hands’ to achieve the finish I was looking for. Time for testing! I didn’t want to polish or remove any surface irregularities of the casting process and ended up burnishing with a brass brush, with very good effect. I stayed away from the stainless brushes, as they leave too many deep scratches on the ally. This was initially done by hand with a short-bristled brush and then ‘buffed’ with a brush with longer, and therefore softer, ‘bristles’. I was dead pleased with the result, and you can judge for yourself. I like it, but there must be an easier and quicker way! (more of that later, I am ‘working’ on something…)
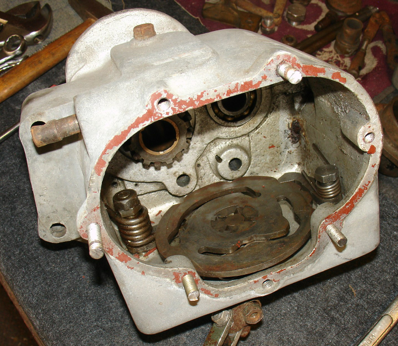
So the cases are clean, now to the contents! I thought that, as I had two boxes with some slight ‘differences’, I’d try-fit everything to find out what I have and what is usable and what is not! The primary headache is the quadrant, as I appear to have two different ones, without any markings…so have to work things out for myself.
Fist thing to go in is the selector-return-spring ‘hook’ , followed by the cam-plate locating nut. After that, the selector plate and selector ratchet and spring go in (you have to push the return-spring ‘hook’ down to fit over the ‘bump’ on the bottom edge of the plate, or it won’t go in!), and the detent spring and outer ring ratchet-pawl.
Now, line up the centre part of the quadrant plate, so that it is at one end or other of its travel, with the pawl engaged properly in the slots (normally this would still be attached to the quadrant, but I had no idea how these two fit together, so had to take tis slightly longer route to find out for sure). Looking at the selector forks, the pins would have to be one up and one down, diametrically opposite to one another…the one closest the front and the other one in a straight line deep inside, in line with the shafts, if you can imagine that (don’t worry, I will post this in more detail with pictures, when I do the final assembly with new bearings, when they arrive!)
So having a look at the detents on the outer rim of the plate and the hole with the four cutouts in the centre…
This is approximately how it should all look (these are the old photos, which I used for reference, by the way…it all look a bit cleaner now!)
Anyway, to cut a long story short, It all went together with more-or-less fiddling and tinkering and now works fine, how I wanted it, with a one-up-and-three-down gear-change!.
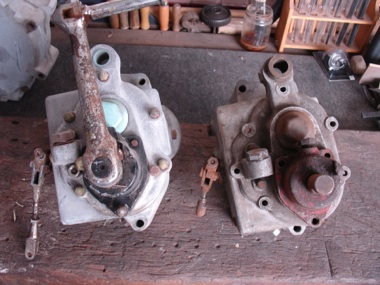
I also busied myself with thw nuts and bolts and covers on the casing, to try out some contrasting finishes, without resorting to chrome or too much polish, so some of the parts are wire-brushed, the tops of some nuts buffed up a bit and still other parts are chemically blacked and oiled instead of black paint. I think the overall effect is very good, despite the domed nuts which will more than likely be replaced? Anyway, here are the rest of the pics and the two boxes from the original set of photos, just to show that there really is a difference! Total cost of the cosmetics? A bit of elbow grease, two wire-brushes, degreaser and rust-remover (for the bits inside, mostly) and some chemical black (from a gunsmiths). The bearings are still to come, so apart from them, the total cost was about $50, but the brushes and chemicals can be used on the other bits, too!
Not bad, eh?
© peter gouws 2012


