The ‘right’ saddle.
Let’s face it, if we actually use our machines, one of the things that gets a fair amount of wear and tear, is the saddle. Whichever type we have fitted, at some stage it will need re-covering. There are new covers available which are of a reasonable shape and size, but somehow they look and feel wrong… why? They might even have that ‘grainy’ look (if a trifle exaggerrated…?) of the old ones, but they are too ‘shiny’ for my taste, some of them are really smooth and the actual material used seems thinner and softer, somehow ‘sticky’ to the touch. I don’t know, maybe it’s just me, but I’m not particularly fond of them as they stand. Then again, perhaps I’m just too used to the look of the worn out ones to remember what they really looked like when they WERE new!
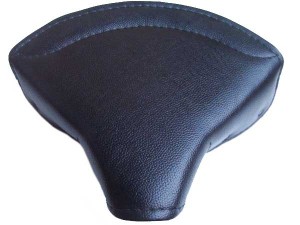
Even more of a problem arises when, if, you don’t have a saddle at all for your ‘project’! The pattern items that I have seen recently (which now all come from one manufacturer, it would seem!) are fine as far as they go, but not quite the type fitted at least to Velocettes, as far as I can ascertain. The size and the shape is not bad, actually and only marginally different to those fitted originally, though the paint finish on both of these ones is not pretty and I have no comments to make on the material quality as yet. I am still not quite sure whether the frame I have actually is original, it is, however, very much closer to original spec than the other one. It doesn’t matter at all, the main thing is that it illustrates the difference between those that are readily available on eBay and the jumbles and what has to be done to make them look ‘right’ and, thankfully, actually fit!
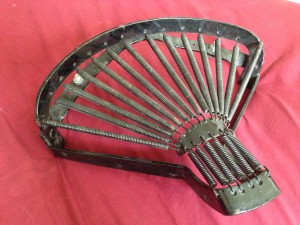
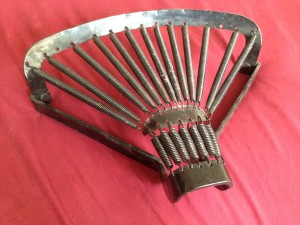
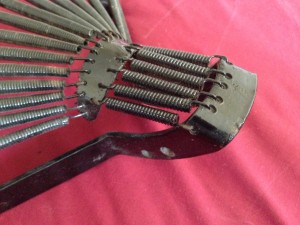
Here what I used to think was an original saddle frame: Having looked at the workmanship and finish, I am now dubious as to its origininality.
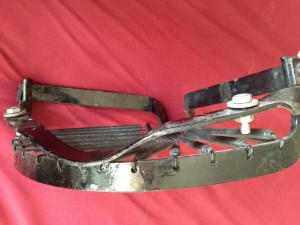
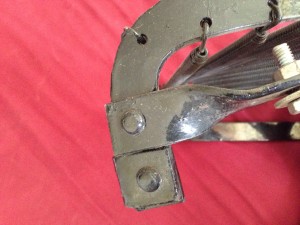
Here the simple rivet fixing for the cross-strap, that makes the difference for Velocette use.
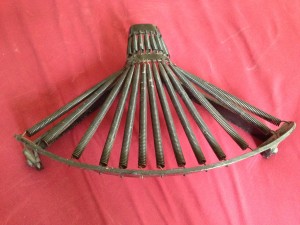
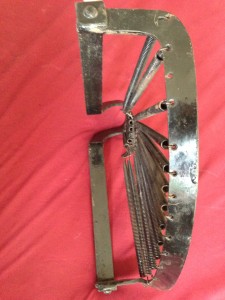
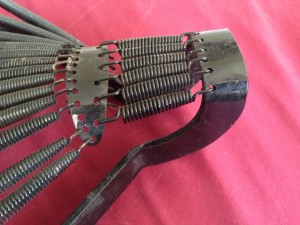
The saddle-frame itself of made of a similar thickness of material, but there is one major difference which needs to be addressed, after which it is difficult to pick from the original! There is a strip which has to be added to the back of the frame, where the springs on a Velo (and probably other makes, too!) are fitted. The one that I had was supplied with some angle brackets (loose) which were supposed to do the same job and could be fitted, theoretically at least, the right distance apart to the rear of the frame for that purpose. A little makeshift and possible not as strong as the original setup, it also is a dead give-away that the ‘wrong’ saddle is fitted. The bump in the middle is, of course, to clear the mudguard when the springs are compressed over a bump in the road and is mirrored on the saddle-cover of the original.
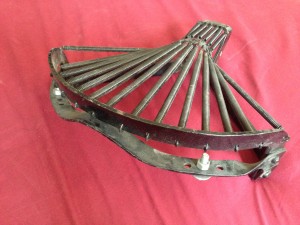
Here the newish pattern (Might also be a few years old…) showing that the rear strap is missing for this particular application:
In the end, I suppose, who cares? Well, I do happen to know that there are those out there that DO care, and while I’m not always a stickler for absolute originality, it IS nice to get it at least looking right, even if not an ‘actual’ original part! Here are the two that I have showing the differences. As there have probably been many different suppliers over the years of these saddles, it is difficult to make absolute measurements and comparisons, but a look at the photos will give an idea of the differences that have to be addressed, in a ‘generic’ way. Thus, armed with a piece of paper and a pencil and a little ‘artistic license’, a template for the rear ‘strap’ can be quickly made up and either cut at home in the workshop or given to someone else to cut… it is quite thick material and most of us will not have the kit to cut something even as simple as this in a reasonable time. Bending, on the other hand, should be done at home to ensure a good fit and shouldn’t present a problem if you have a decent sized vice!
You will notice that the front portion on the pattern saddle is a little different to the original, which section is ‘better’ is purely a matter of taste. The front mountings will have to be manufactured to fit the particular bike that the saddle is intended for, so I have left them out.
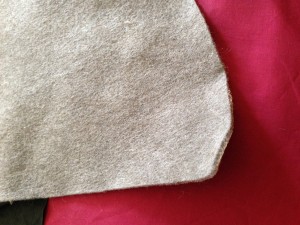
Here the nose of the one with the cross-strap:
And the ‘nose’ of the other one:
The covers themselves pose a slightly different problem. Allow me a personal note here, as I have definite preferences in this department! I know that many decry the use of dead cow for the covering, the reason given usually being susceptibility to moisture and rain. Hm. Actually I agree, BUT (no pun intended) when riding, my rear-end is usually planted firmly in the saddle and so it doesn’t get wet from the sky above anyway! After getting off, I always have a plastic bag handy to place over it (like the cycle-riders) if it should be raining, which it only does for 25% of the year anyway. How many owners of machines fitted with these types of saddle go for runs in the rain anyway, I ask? There aren’t that many, so I really don’t understand why the voices are so loud. Any old hair-net will do, actually, but if you have had the dexterity to sew the saddle in the first place, a suitable rain-cover shouldn’t be an insurmountable problem!
(The older US manufacturers use metal seat-pans that are merely ‘faced’ with leather, and so they have completely different set of rules to follow when considering replacement)
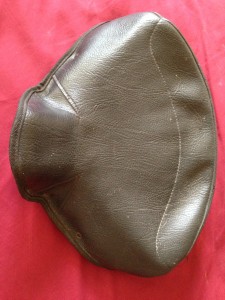
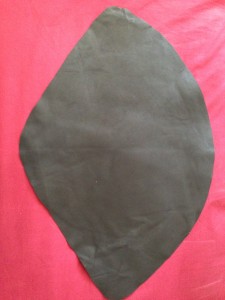
Here is a very good copy, if not an original cover. This one fits the base properly and will be anyway only used to copy for my ‘proper’ leather one.
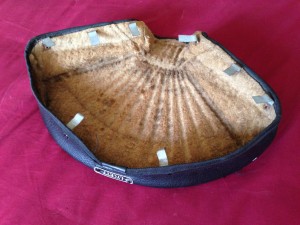
Here from the underside…
… And I have made patterns from this one for anyone interested in having a go themselves, which I will post to you if requested. I suppose that I could also scan them or draw it up in a CAD program, but then the problem is printing them out… Perhaps in two halves? If you have a modern pattern saddle to re-cover, you will have, of course, to use the cover that came with it to make the pattern for the replacement, if you are going to go to the trouble of making one yourself, rather than just buying one ‘off the shelf’.
On the other hand, I do love leather as a covering for one particular reason (apart from the ‘optics’): Have you ever ridden a long distance on a plastic saddle (of any kind – even a modern bike?). The sticky, sweaty bum (and other bits) syndrome is undeniably present in any climate and if riding is continued over a few days, can lead to the famous jungle crotch-rot, which is most unpleasant, including to those in the immediate vicinity…
We should all wear leather or some sort of protective clothing (Modern hi-tech textiles are fantastic! Light and offering better ‘breathing’, despite being far more waterproof…). And so there we have it: BREATHING! Why bother with a seat on your pants that breathes, if the saddle provides an impervious barrier to the expulsion of (in the summer at least) rapidly accumulating body-fluids originally designed to cool the skin by evaporation, in the resultant hot-spots. Very counter-productive and actually counter-intuitive. Plastics were only chosen by virtue of cheapness and availability (= convenience). The plastics chosen being impervious to fluids, also collect bacteria very nicely and, of course, hinder any evaporation while seated in contact with them, all very much in the best possible taste, I know, but these things are sent to try us (and sometimes out partnerships…). These (bacteria and fluids, not the partnerships!) then have nowhere else to reside or go and therefore collect in whatever material is between the plastic saddle surface and your skin. How savoury!
SO LEATHER, on the other hand, allows the soaking and ‘wicking off’, and therefore evaporation from the ‘under-surface’ of the saddle where there is some considerable airflow, of any perspiration and so provides a very comfortable seat base over extended distances. This situation is ONLY present if there is not an impervious sponge rubber underneath, which then causes the fluid to accumulate in the leather covering (and fester there, instead of ‘in yer trousers’,) which is not really much better, as it soon returns from whence it came as the moisture accumulates over a certain level.
Leather, then, is only good if there is sufficient flow of air around it (usually on the underside, as we are sitting on the top!), which brings us to the next point: The padding! If the seat cover is plastic, it matters not if there is sponge rubber under it, BUT, if the cover is leather, it needs a breathable padding that gives sufficient hindrance to the springs digging into one’s posterior, whilst not hindering the airflow and wicking action. Unfortunately, the wonderful horsehair matting that was used on the underside of original (although plastic covered!) saddles is unfortunately no longer available (as far as I can see, and I have tried, believe me) and so an alternative has to be found, even if you are going to re-cover with plastic.
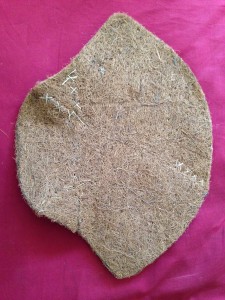
The nearest I could find (and PLEASE, if you have a better alternative, let me know!) is the coconut-matting found at garden-centres for lining hanging-baskets! It is the right thickness and firmness and is of the right ‘consistency’: The only trouble with this is that it produces so much ‘dust’ if the underside is left open. I also assume that due to this, that it probably eventually thins out, too. There are even plastic-coated versions (I can’t remember what for) which wouldn’t do that, which I would not use for obvious reasons. So with the coconut-matting, it has to be covered with something on the ‘outside’ with some other material open enough to aerate, but woven closely enough to stop the coconut ‘hairs’ dropping everywhere…
Here just roughly sewn together, as the stitching to the cover keep it all in one piece once done!
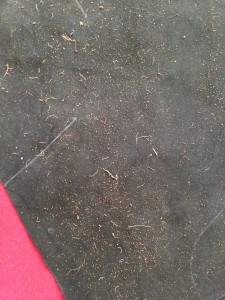
That coconut fibre is really a little too messy for my taste (see below, after a good shake over the leather… just imagine what a nice shiny black mudguard would look like!
The BEST and the most efficient (and ‘authentic’) padding comes from old VW Beetles and Vans at the breakers-yards… which used to have the very same padding over the springs as Lycette or Terry did! BINGO! One of the only remaining sources, but not always readily available in a suitable condition, quantity or price!
And so to the topside:
If it is to be made of some kind of leather, chrome-tanned leather is imperative for this kind of sprung seat, as veg-tanned leather will sag dramatically after the first ride and will look dreadful, no matter how thick or thin. For sewing the type of saddle that we generally use, Wallaby or Kangaroo is the best for maximum resilience and weather-resistance. It is thin and extremely tough, elastic (so it keeps its shape well) and easy to sew. The surface is suitably ‘grained’ or is at least matte and so non-reflective. It is not available everywhere, but is well worth the search, if leather is what you decide on. All the ‘Conolly’ type hides tend to be too thick and a bugger to sew and deteriorate rapidly in the sunlight if not meticulously kept. So yes, I agree, leather can be a pain in general, but if you get the right sort… If necessary, I can possibly get access to Wallaby hides in limited quantity from Australia, but I have no idea of the price, to which postage would have to be added. The last ones that I bought in AUS were about a tenner each, but I have no idea if my then source has ANY more left, let alone at that price.
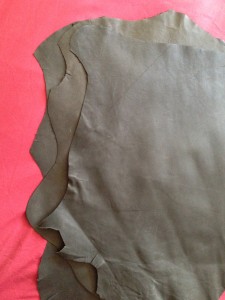
Here some nice little Wallaby skins:
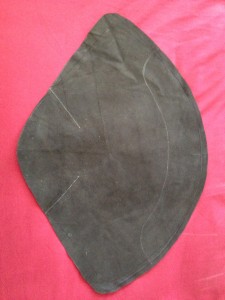
And here a leather saddle-top marked on the inside in white pencil for final cut of the triangular ‘inserts’ and sewing.
Topside, showing minimal, but pleasant, natural grain. (not ‘printed’)
And something I ‘scored’ from an upholsterer, which I was going to use to ‘seal’ the ‘precipitation’ from the coconut fibre with…
For simulated leather or ‘leatherette’ tops, there are plenty available in all sorts of ‘grain’ finishes from most retailers dealing in fabrics, the choice is broad and they are very reasonably priced. The difference in quality and price will depend on thickness, UV resistance and the cloth backing. Buy the best quality that you can afford and choose the surface finish that you desire! They are all cloth backed and half a meter is enough for a couple of saddles. More important than with the leather, keep an eye on which way it stretches: If across the frame, it will ‘sag’ in between the springs quicker than if the stretch is longitudinal, but this will have no effect on the actual function of the saddle, only the way it looks. Here the important thing to watch as with any saddle, is the firmness of the ‘stuffing’ between the top and the springs, that is what makes the difference in the comfort, especially if you have a bony backside.
As ever, I would be appreciative of any helpful comments or additions to the opinions stated here, which are only based on personal experiences!
At this point I must shamefully admit that the saddle-covers that I have previously made have wandered into private hands in Australia and therefore that I have nothing that I have made to show you here! As you can see, there is one in the making, which shall be followed up on once finished, but I have a few weeks of concentration on other things in the meantime… Perhaps I will fit it in, though. I would still rather source a VW seat, before I commit myself to going to the trouble of sewing another one for myself…
© peter gouws 2014
